How to Install Hardwood Floors : Step by Step Guide
A lot of people would like to learn how to install hardwood floors so they don’t need to hire a professional installer, which can cost a lot of money.
Compared to other flooring options, the hardwood floor is very durable. It lasts longer and can be refinished or re-stained if you want to change its appearance.
Although the process of installing hardwood floors is more complicated compared to vinyl or carpet, it’s worth it. If done right, the floor can last for decades.
You will find several different options for hardwood flooring. The solid wood consists of a continuous piece of solid wood, which is about 3/4 inch thick. Meanwhile, the wood strips are the type of hardwood floors with a width of 1-1/2 inches to 2 inches. For a much wider option, you can choose the planks. They are about 2-1/4 inches in width.
Regardless of the type of hardwood floors, the process of installation is pretty much the same.
How to Install Hardwood Floors
Tools Required for Hardwood Floor Installation

Image Credit: Home-designing
Before you get started with installing solid hardwood floors, you must prepare the required tools. That way, you will not be interrupted as you go through the installation process. The hardwood floor installation tools would sometimes vary, but they generally consist of the following:
1. Chalk line
2. Chop saw
3. Drill bits
4. Ear protection
5. Hammer
6. Nail set
7. Safety goggles
8. Staple gun
9. Table saw
10. Tape measure
11. Variable speed drill
Also Read: 36 Elegant Entryway Design Ideas
Installing Hardwood Floors – Step by Step
Step 1 – Choose the Type of Hardwood Floor
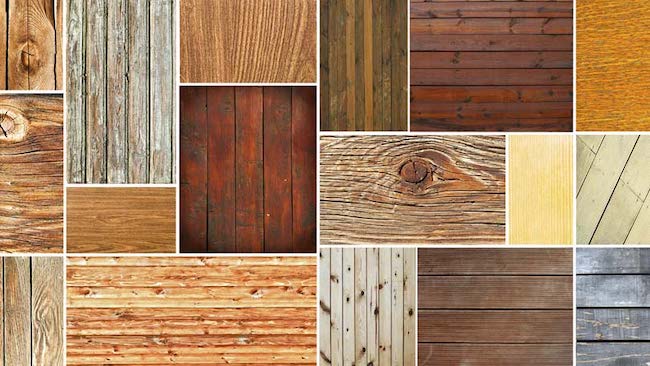
Image Credit: Professor’s House
As mentioned, there are several different types of hardwood floors that you can find. They come in different hardwood species and board widths. When choosing the hardwood floor to install in your home, you must first decide whether to go for engineered hardwood or solid hardwood.
Engineered hardwood is a manufactured wood. The bottom and top layers of the engineered hardwood are about 4 mm thick and made from natural wood of different species. At the center of each plank are several layers of manmade plywood.
On the other hand, solid hardwood consists of a single plank of solid wood. They are usually 3/4 inch thick and can be sanded down and refinished as time goes by.
If possible, visit a flooring specialty store near you. That way, you can have a closer look at the different types of hardwood floors.
You’ll be amazed at the wide range of options you can find. Going to the store will also allow you to examine and touch the flooring and even walk on them, so you will know how it feels underfoot. You might also find other less common types of hardwood floors, such as the parquet, bamboo, and cork.
Step 2 – Measure the Room
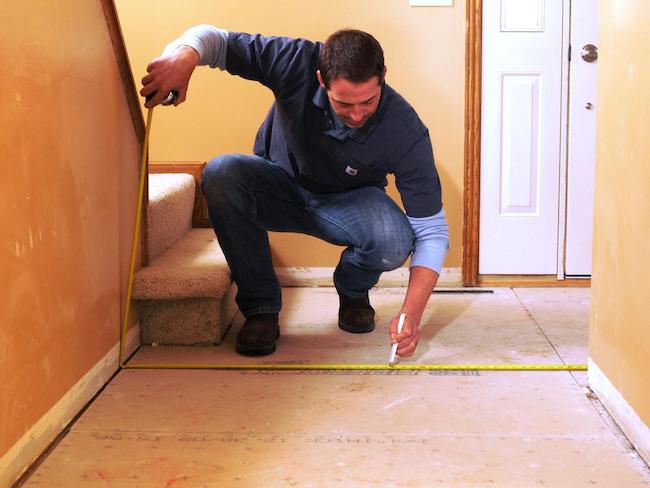
Image Credit: DIY Network
Once you have decided on the type of hardwood floors to install, it’s time to purchase them. But in order to know how many planks you need, you must first measure the area of the room for where you intend to install the flooring.
Take measurements of the room’s width and length, then multiply them to get the square footage. When buying hardwood floors, you should allow 10 to 15 percent extra in case of irregularities and cutting mistakes.
If you are not sure how many planks of flooring to buy, you can ask the staff of the flooring specialty store. Give them the measurement of the room and they should be able to advise you on the number of hardwood floors you need to purchase.
Step 3 – Check the Subfloor
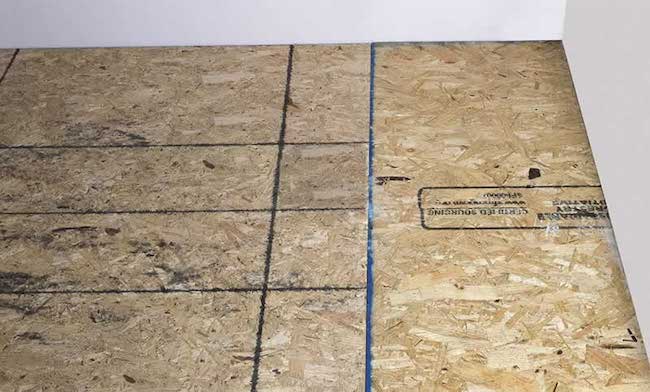
Image Credit: Arrow Fastener
Now that you have the hardwood floors that you need to install, it’s time to get started with the installation process. But in order to avoid any issues, you must first examine the subfloor. The minimum requirements for the subfloor of hardwood floors are 3/4″ plywood.
Carefully inspect the subfloors and make sure there are no squeaks. If there is a squeak, screw long drywall into the subfloor and joist where the squeak takes place.
Take off the shoe molding from the room, then sweep and wipe the sub-flooring thoroughly before you get started with the hardwood floor installation.
Step 4 – Prepare the Vapor Barrier Paper
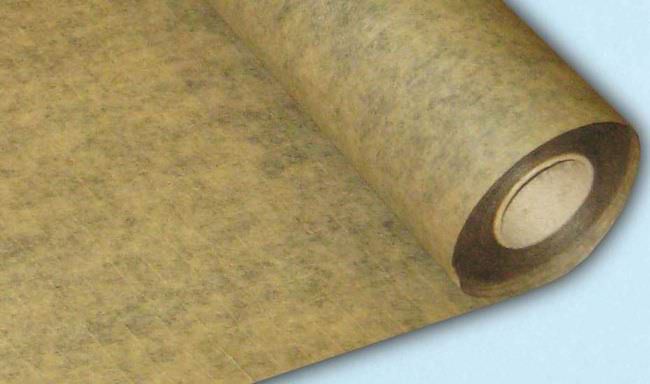
Image Credit: Archi Expo
Next, get the vapor barrier paper and roll it out. Roll out several strips of the paper, and allow an overlap of at least four inches. Staple the paper securely into the subfloor.
You can use a 15-pound felt or tar paper for the vapor barrier. This is generally inexpensive costing, around $12 per roll only. Get a pencil and mark along the baseboards where you can find the joists.
Step 5 – Start With the Installation
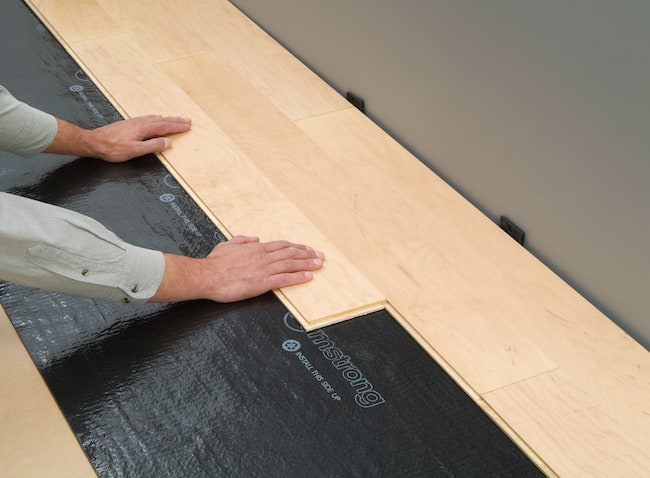
Image Credit: Architectural Digest
Now you can start installing the hardwood floors. It’s a good idea to start at an area with the longest unobstructed wall.
Remove the shoe molding then snap a chalk line of about 3/8 inches from the baseboard. This will allow for the expansion of the floors during hot weather or contraction during colder and drier weather.
Step 6 – Place the Boards
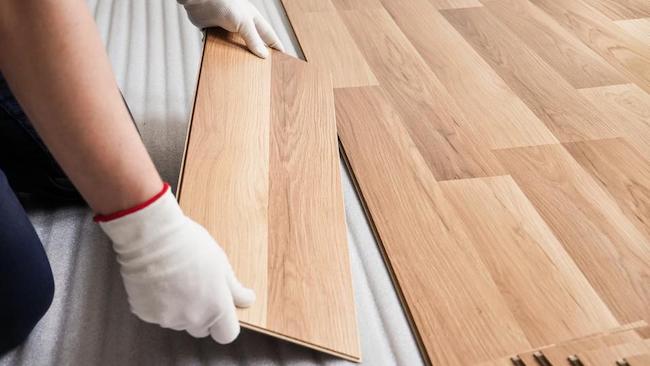
Image Credit: Forbes
When placing the boards, begin by choosing a longboard to begin the first row. Choose the straight plank, then align the edge of the board with the chalk line.
Drill pilot holes through the planks and into the subfloor and joist. Face-nail each of the boards at the point of every joist, then set the nail using a nail-set.
Next, face-nail the entire first row and make sure to keep the lengths of the board random.
It’s important that you face-nail the first row since the pneumatic nail won’t be able to get down in there. This will hit the wall and the force could push the wood against the baseboard and the 3/8″ expansion or contraction could be lost.
Make sure to first lay the boards perpendicular to the joists that are underneath. This is for you to have a beautiful solid anchor for your hardwood floors. Check the subfloor and see where the nails and seams ran. You may need to crawl underneath to see how they run.
After installing the first few rows of the hardwood floors, drill pilot holes into the tongue of each board then hand-nail the rolls until there won’t be enough clearance for the nail gun.
Step 7 – Staple the Boards
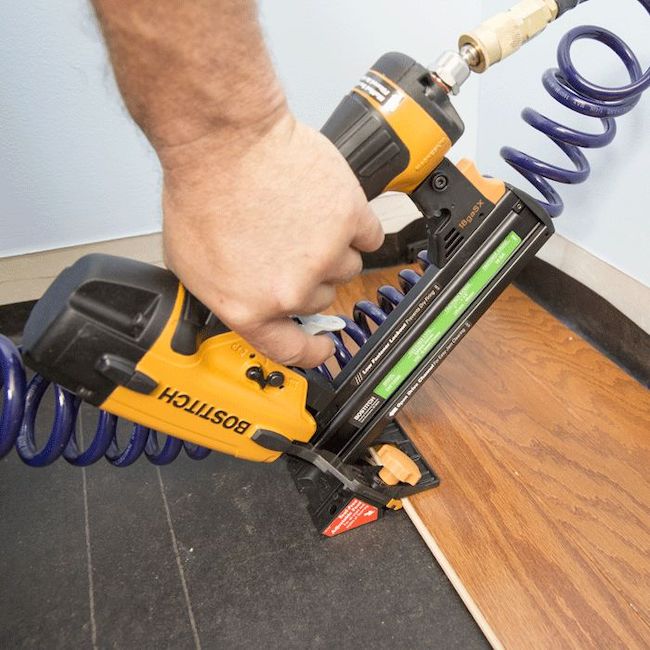
Image Credit: Lowes
The next step is to staple the boards. Get the pneumatic nail gun and place the gun lip over the edge of the board, then strike the mallet firmly. Make sure that the staple is driven into the tongue of the hardwood plank.
When installing hardwood floors up to a threshold, you do not need to make exact cuts. You can come back later after the floors have been installed, then get a circular saw to cut across to achieve a more precise cut.
Step 8 – Fill in the Gaps
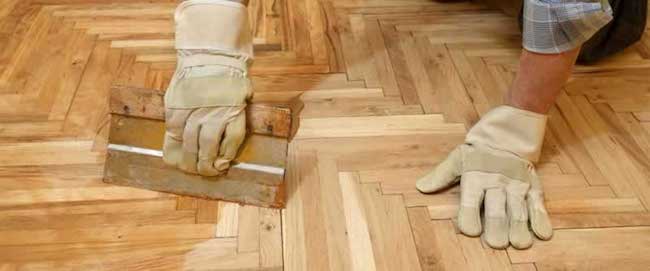
Image Credit: Handyman Tips
The final step on how to install hardwood floors is to fill in the gaps between the hardwood floors. Be very sensitive with the way the ends of the boards fit together. One end should have a tongue while the other end has a groove. This is also known as the end matched.
You may need to cut the wall end of the boards so you will not cut off the groove that fits into the tongue. When this happens, this could lead to a pretty big gap.
Look for a piece and lay it alongside the hole, then flip it over. When making the mark to cut off the wall side, butt it up against the baseboard then mark at the end of the tongue. This will leave a 3/8″ gap to allow for the expansion or contraction of the floors.
Also Read: 15 Creative Room Dividers for Studio Apartments
Tips for Installing Hardwood Flooring

Image Credit: Flooringinc
Installing a hardwood floor is easy, but it requires basic carpentry skills. If this is your first time, these hardwood floor installation tips will come in handy:
Allow the Wood to Get Used to Your Home
Before you begin with the installation, allow the hardwood boards to sit for several days in the room where you plan to install them. This is to allow the wood to “acclimate” to the new environment, especially in the variations of temperature and humidity.
Make Sure the Floor is Above Grade and Level
It’s not a good idea to install hardwood floors that are below grade. It must also not rest directly on concrete. Instead of installing hardwood floors on concrete, use plywood for the subfloor. Make sure the plywood has appropriate thickness.
Above all, ensure that the subfloors are leveled well and attach underlayment and moisture barrier to them.
Use the Right Tools and Wear Safety Gears
Make sure you have the necessary tools if you insist on doing the hardwood floor installation on your own.
Of all the hardwood floor installation tools, the pneumatic floor stapler is the most important tool to have. You can buy or rent this tool from your local hardware store.
Remember, this is a heavy-duty and dangerous tool to use, so make sure you wear eye protection and other safety gear, such as gloves, knee pads, etc.
Also Read: How to Decorate a Rental Apartment
Final Thoughts
Hardwood flooring is a popular choice of flooring because aside from being aesthetically pleasing, they are durable and will last longer.
Some of the engineered hardwood floors are easy to install since they come with a tongue-and-groove design intended to snap together.
Do-it-yourselfers who wanted to save money on installation can use the guide above on how to install hardwood floors. But if you feel like you do not have the tools and skills to do it yourself, hire a flooring specialist for help.

